Connecting to an online meeting
There are several ways to connect to an already created meeting:
- Click on the event in the MS Outlook calendar via the “Join Teams Meeting” button.

- Click on the event in the Web Outlook calendar and select “Join Meeting via Teams”.

- By opening the event in the calendar in MS Teams and clicking on “Join”.

- Click on “Join a meeting via Microsoft Teams” in the invitation email or calendar event.

Meeting control in MS Teams
Permissions of meeting participants
Meeting participants can have two states:
- “Presenting” – this is the default state for all present. The presenter can perform all of the following operations in the meeting.
- “Participant” – cannot start recording communication and cannot allow guests into the communication.
The meeting can be controlled using a set of icons at the top of the window that are displayed during the online meeting. (For this display, you need to have “Enable new meeting environment” selected in MS Teams settings – recommended). 
Control options
- Camera icon: to turn the webcam on/off
- Microphone icon: mute/cancel microphone mute
- rectangle with arrow: display the desktop sharing menu
- three dots: other meeting options
- “bubble”: view chat in a meeting
- character symbols: representation of meeting participants
- red button: disconnect from meeting
Ability to share the monitor or application desktop with meeting participants (Microsoft Whiteboard)
Tap the desktop sharing icon to see a selection of what you want to share.

It is possible to share
- The entire monitor area. If you have multiple monitors, you can select which monitor you want to show to your partners.
- An application window. Then partners can only see this application.
- PowerPoint presentation. Partners can then see the presentation and can flip through it independently of the presenter.
- Table. When you share, the Microsoft Whiteboard app launches and everyone in the meeting can draw on it. You need to have the app installed on your devices. Whiteboard sharing is not available for instant adhoc meetings.
- Sound from a computer (only when sharing from an installed app, not available via the web interface).
Taking over management
When sharing content, it is possible to hand over control to one of the meeting participants. This is useful if, for example, he or she has something to show the other participants or is providing you with technical support.

More options under the “three dots” in an instant call

- View device settings: view audio and camera settings
- Focus: brings shared content closer
- Apply background effects: You can replace the background behind you with an image or blur the background.
- Turn on live captioning: the participant turns on speech-to-text transcription only for himself (works only for English)
- Start recording: the content of the meeting will start recording. The recording is then available for download (for basic license users) or saved to MS Streams (A3 license users)
- Start recording: starts recording the communication.
- Disable incoming video: useful when video is not necessary and there are connection quality issues
- Hold: temporarily disconnects the participant from the meeting
- Reconnect: “parks” the current connection in a meeting and allows you to start communicating with someone else
- Consult and transfer: puts the call on hold and allows you to chat with someone else before transferring.
Other options under the “three dots” when scheduling an appointment

- Show device settings: shows audio and camera settings options.
- Gallery view: classic view with fewer participants.
- Large Gallery View: allows up to 49 participants to be displayed simultaneously, with views available from 10 or more participants.
- View Together Mode: “seats” call participants, view available from 5 or more participants.
- Focus: zooms in on shared content.
- Call me: allows you to dial a specified number – the recipient of the call hears the call in progress and can answer it by voice.
- Apply background effects: You can replace the background behind you with an image or blur the background.
- Turn on live captioning: the participant turns on the speech-to-text transcription only for him/herself (works only for English).
- Start recording: the content of the meeting will start recording. The recording is then available for download (for basic license users) or saved to MS Streams (A3 license users)
- Start recording: starts recording the communication.
- Disable incoming video: useful when video is not necessary and there are connection quality issues.
View participants

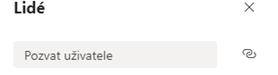
Click on the character icon to see the participants in the meeting. Here you can see the participants
- mute the microphone,
- Pin/unpin the subscriber to the screen
- remove the participant from the meeting,
- change the status of a participant from “presenter” to “participant”.
At the same time, you will see the option to invite another user to the meeting or to copy a link to the meeting.